Why Wont My Powerpoint Upload to Kaltura
PowerPoint: How to Add Audio to Powerpoint on Windows ten and Mac
Last updated
Microsoft PowerPoint offers features to record sound narration and consign it as a video. PowerPoint records sound slide-past-slide rather than in 1 continuous file, allowing creators to easily re-record a slide if they make a mistake or need to change something later. Exporting as a video and uploading to Kaltura or Canvas for streaming is advantageous since it standardizes file types, doesn't crave a download to view, is in a format that tin can exist captioned, and allows viewers to navigate more efficiently.
A recent update has made the process comparable on a Mac, but the specifics vary. Windows 10 instructions follow; Mac users can click the link below to jump to the advisable instructions.
- Instructions for Mac users
Windows 10 Instructions:
The following instructions explain how to add sound to your PowerPoint presentation on Windows 10 and export that PowerPoint equally an MP4. The text instructions comprehend the same data as the embedded video below.
Notation: If you lot have an older version of PowerPoint, you may need to update it to access the features described beneath. If you practice not have PowerPoint, you lot tin can download information technology and other Microsoft Office products for free past going to office365.uwec.edu. If yous have questions about updating or installing PowerPoint, contact the LTS Assistance Desk at helpdesk@uwec.edu or 715-836-5711.
- Design your PowerPoint
TIP: Use images and limit text to better engage viewers/listeners.
- Click the Slide Show tab
Note: Do non add together audio under Insert and Record Audio; this method will not allow you to salvage your PowerPoint as a video since it does non synchronize timings to automatically motility the slides with the audio.

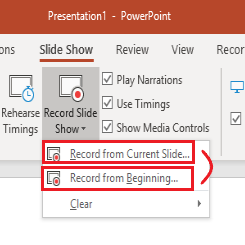
- Click Record Slide Show
NOTE: Audio may start recording automatically if you accept an older version of PowerPoint. It volition still work, but this version offers reduced functionality. - Select Tape from Current Slide or Record from Beginning depending on your needs
Annotation: Any PowerPoint slide can be re-recorded by clicking Record Slide Bear witness and Selecting Record from Current Slide .
- Click Tape to start recording narration for a slide.
Note: PowerPoint will give a iii-second countdown earlier information technology begins recording.
- Record narration and avoid reading text on the slide out loud to viewers. Click the bluish Replay button to listen to the recorded audio and ensure information technology was recording.
- Click the
 accelerate button, that reads Accelerate to the next animation or slide to record the narration for the next slide Important: Stop speaking for a second to prevent the audio from cut out.
 - Press [Escape] or the 'Ten' push button located in the top correct of the screen when the sound recordings are finished. You will see a speaker icon on slides that have audio.
- Relieve the video by first clicking File. We recommend saving your file every bit a regular PowerPoint earlier following the next steps for exporting your PowerPoint.

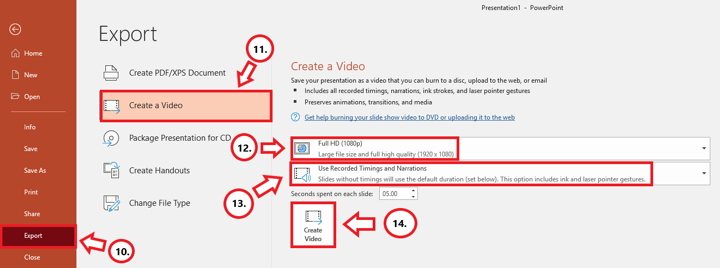
- Select Consign (steps 10-14 are shown in screenshot below).
- Select Create a Video.
- Optional: Select Full HD (1080p) for the video quality; it is unlikely a higher quality is needed.
- Select Use Recorded Timings and Narrations.
- Click Create Video.
- Follow prompt/popular-upward window to save the video in a memorable location.
- Monitor the progress indicator at the bottom of the screen to determine when the video is done exporting.
NOTE: PowerPoint does not give an indication of how long the video will take to export or a notification that it is done.
- Upload your mp4 video to Kaltura or Sheet to share it:
- How to upload and share with Kaltura (Instructors should utilize Kaltura. Students will need to use it if the file is over 500 MB, which a PowerPoint probably won't be and they can utilize Canvas.)
- How to upload and share in a Canvass consignment (students)
- How to upload and share in a Canvas discussion (students) - the instructions refer to the "rich content editor" which is just the features in the top of the discussion post reply.
Elaboration on the Recording Features:
- Timing Feature – there is a rolling fourth dimension feature for the individual slide and the overall presentation. Allows the speaker/presenter to monitor how long they are talking.
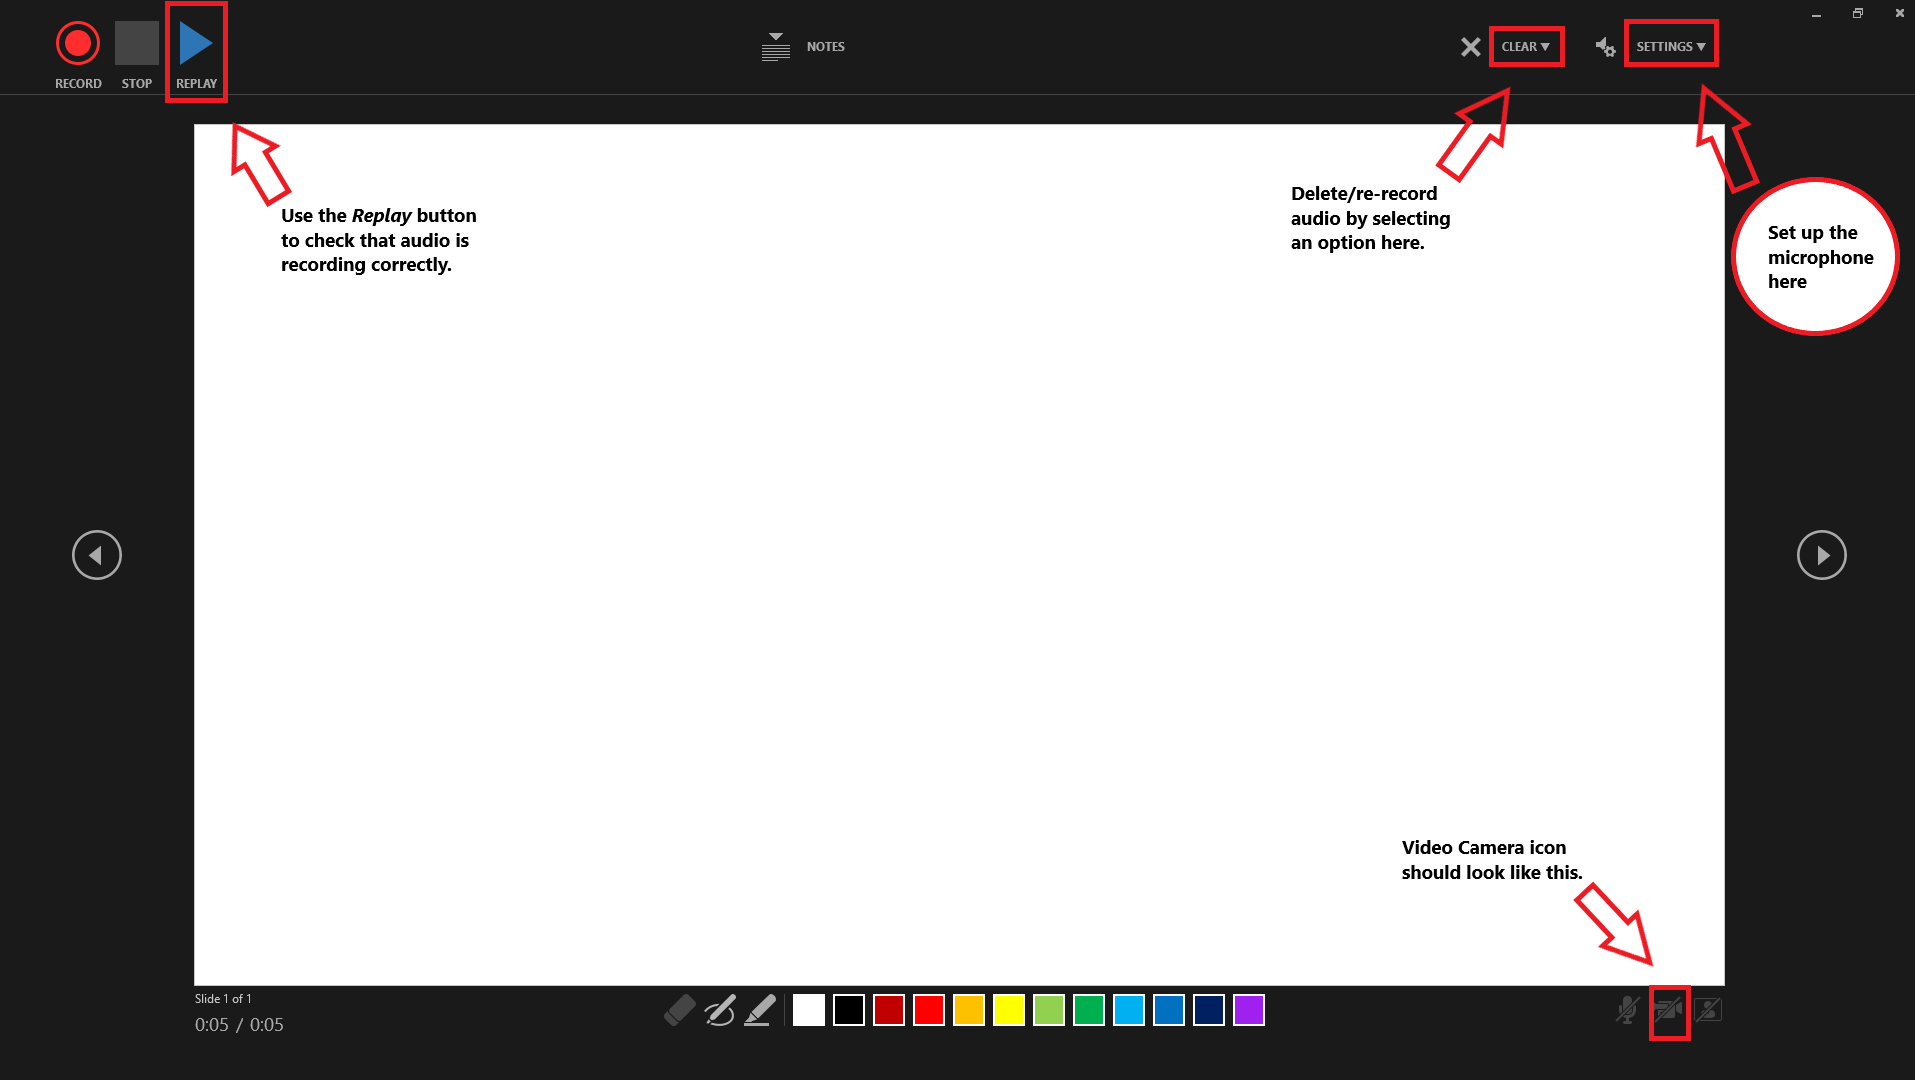
- Microphone Characteristic - Click on Settings and select Microphone and then the specific device to gear up upwardly before recording.
- Replay Feature - Use to check that the audio is recording properly before starting additional slides.
- Clear Feature - Select Clear to delete/re-tape audio.
- Don't set the camera to tape - Make sure this button has a diagonal slash through it to avert the trouble.
- Seconds spent on each slide feature – Used for when a slide does non have audio, therefore it's recommended to have audio on each slide.
Mac Instructions:
The following instructions will teach you how to add together audio to your PowerPoint presentation on a Mac and consign that PowerPoint as an MP4. The text instructions cover the same data as the video embedded below.
NOTE: It is essential to take the Part 365 version of PowerPoint or yous volition not be able to save your PowerPoint every bit a video. If necessary, you can download it and other Microsoft Function products for free by going to office365.uwec.edu. If you lot have questions about updating or installing PowerPoint, contact the LTS Aid Desk at helpdesk@uwec.edu or 715-836-5711.
- Design and create your PowerPoint presentation.
- TIP: Use images and limit text to ameliorate appoint viewers/listeners.
- TIP: Use images and limit text to ameliorate appoint viewers/listeners.
- Click the Slide Evidence tab
- Notation: Do not add audio under Insert and Record Audio; this method will not allow you to save your PowerPoint equally a video since it does not synchronize timings to automatically move the slides with the audio.

- Notation: Do not add audio under Insert and Record Audio; this method will not allow you to save your PowerPoint equally a video since it does not synchronize timings to automatically move the slides with the audio.
- Click Record Slide Show
- Review the narration setup and navigation before recording.
- TIP: Earlier you brainstorm recording your total presentation, do a practice recording to verify your microphone and other settings are right.
- Click the red circle recording button (top centre of the screen)
 to record the narration for the slide.
- Notation: Avert reading the text written directly on the slide; employ the slide to elaborate on the material being presented.
- Stop speaking for a second to prevent the audio from cutting out as slides change. Resume speaking when the time starts moving once again under the Current slide timing feature to the left of the recording push button.
- Click Stop or Pause at the tiptop of the screen and and then Cease Bear witness in the top left corner when all the sound recordings take been finished.
- Check the audio by clicking on Play from Get-go under the Slide Show tab or the presenter manner icon at the bottom of the screen.
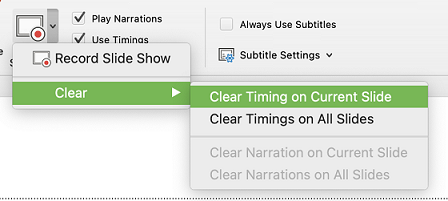
- If you need to re-tape a slide, you lot can delete the speaker icon on the desired slide to remove the sound AND clear the slide timings under Slideshow > Record Slideshow > Clear > Clear Timing on Current Slide. Y'all may then re-record the audio and slide timings.
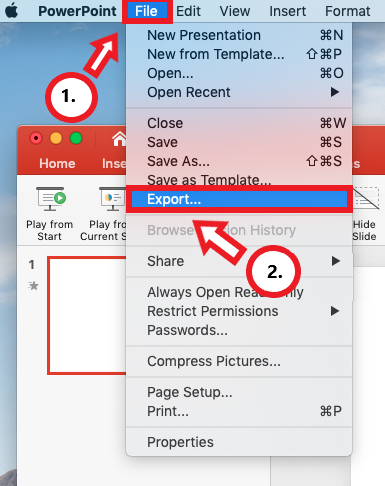
- To save the PowerPoint as a video, click File and then select Export. Nosotros also recommend saving your file as a regular PowerPoint before following the next steps for exporting your PowerPoint.
- Edit the proper name of the file and where you would like to save the video post-obit PowerPoint's prompts.
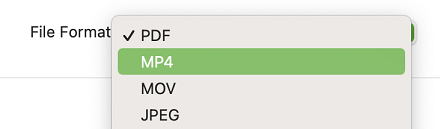
- Select MP4 from the File Format options list.
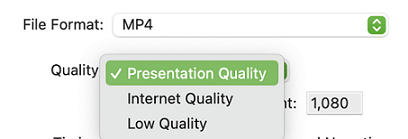
- Select Presentation Quality or Internet Quality. Presentation Quality volition take longer to export.
- Confirm that the "Use Slide Timings" checkbox is selected.

- Click Export
- Monitor the progress indicator at the bottom of the screen for when the video is no longer exporting.
NOTE: PowerPoint does non give an indication of how long the video will have to export.

- Upload your mp4 video to Kaltura or Canvas to share it:
- How to upload and share with Kaltura (Instructors should use Kaltura. Students will need to apply it if the file is over 500 MB, which a PowerPoint probably won't be and they can use Canvass.)
- How to upload and share in a Canvas consignment (students)
- How to upload and share in a Canvas discussion (students) - the instructions refer to the "rich content editor" which are the tools at the summit of the word postal service reply.
hubbardwhinged1940.blogspot.com
Source: https://www.uwec.edu/kb/article/how-to-add-audio-to-powerpoint-on-windows-10-and-mac/
0 Response to "Why Wont My Powerpoint Upload to Kaltura"
Post a Comment